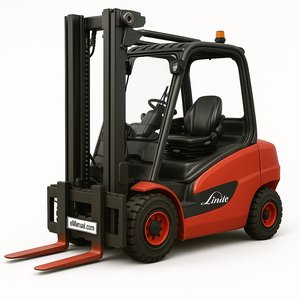
Linde Electric Forklift Truck 335-02 Series: E14 E16 E18P E20P Service Training Manual PDF Download
Original Illustrated Factory Workshop Service Manual for Linde Electric Forklift Truck E-Series Type 335-02. Original factory manuals for Linde Forklift Trucks, contains high quality images, circuit...
One-time purchase - Lifetime access
Instant Download
Get access immediately
Secure Payment
SSL encrypted checkout
24/7 Support
Help when you need it
Money Back
30-day guarantee
What's Included
Complete Service Manual
Full PDF documentation
Step-by-Step Procedures
With detailed diagrams
Wiring Diagrams
Electrical schematics included
Specifications
Torque values & specs
Troubleshooting Guides
Diagnostic procedures
Lifetime Access
Download anytime
Original factory manuals for Linde Forklift Trucks, contains high quality images, circuit diagrams and instructions to help you to operate and repair your truck
Covered models:
E14
E16
E16C
E16P
E18P
E20P
Format: PDF, 126 pages
Language: English
Included chapters:
1. Traction
1.1 Traction motor
1.2 Right hand Traction motor 1M1
1.3 Checking and renewing the traction motor brushes
1.4 Traction motor disassembly
1.5 Checking of the D.C. motor
1.5.1 Visual check
1.5.2 Checking during operation
1.5.3 Winding measurements
1.5.4 Checking on insulation
1.5.5 Reworking the collector
1.5.6 Brush switches
1.5.7 Terminals
1.5.8 Cleaning
1.5.9 Thermal sensor
1.6 Traction motor fan
1.7 Optional speed sensor
1.8 Assembly of drive units
2 Drive gearbox
2.1 Planetary gear GR2E-02
2.1.1 Renewing the radial shaft sealing ring
2.1.2 Oil level check and oil change
2.1.3 DisAssembly and assembly of the traction motor
3 Chassis and bodywork
3.1 Seat switch
3.1.1 Replacement of seat switch
3.2 Operator's cabin
3 3.2.1 Torsion leaf springs
3.2.1.1 Removing and installing the torsion leaf springs
3.3 Transportation device
4 Steering system
4.1 Close-coupled steering axle E 14, E16, E 16C
4.1.1 Steering axle removal
4.1.2 Steering axle disassembly and sealing
4.1.3 Steering axle installation
4.2 Combination steering axle E 16P/ E 18P / E 20P
4.2.1 Steering axle removal
4.2.2 Steering cylinder and track rod link
4.2.3 Renewing the steering cylinder seals
4.2.3.1 Steering cylinder (Type Rochlitz)
4.2.3.2 Steering cylinder (Type Weber)
4.2.3.3 Renewing the wheel hub tapered roller bearings and shaft sealing ring
4.2.3.4 Renewing the axle body tapered roller bearings and wipers
4.2.3.5 Installing the steering cylinder and track rod link
4.2.3.6 Steering axle installation
4.3 Servostat
4.3.1 Steering control valve with inductive Sensor
4.4 Renewing of steering position potentiometer
5 Controls
5.1 Travel control
5.1.1 Truck speed controller
5.1.1.1 Adjustment of the pedal stop screws
5.1.2 Single-pedal direction switch
5.2 Braking
5.2.1 Renewing the brake linings
5.2.2 Adjusting the parking brake
5.2.3 Adjusting the foot brake
5.2.4 Renewing the brake fluid
6 Electrical equipment
6.1 Introduction
6.2 Explanation of Functions
6.2.1 Traction drive
6.2.1.1 Motor control
6.2.1.2 Forward direction
6.2.1.3 Reverse direction
6.2.1.4 Free-wheel circuit
6.2.1.5 Regenerative braking
6.2.2 Pump motor
6.3 Power units
6.3.1 General
6.3.2 Power unit A1
6.3.3 Power unit 1A1
6.3.4 Power unit temperature monitoring
6.3.4.1 Power transistors of the traction drive
6.3.4.2 Power transistors of the working hydraulics
6.4 Position of connectors
6.4.1 Trucks with individual controllers
6.4.1.1 E14 individual controllers
6.4.1.2 E 16 - 20 Individual controllers
6.4.2 Trucks with combination controller
6.4.2.1 E14 Combination controller
6.4.2.2 E 16 - E 20 combination controller
6.5 Fuse
6.5.1 Trucks with individual controllers
6.5.2 Trucks with combination controller
6.6 Control circuit - individual controllers
6.6.1 Traction controller
6.6.1.1 Power supply
6.6.1.2 Charging of the capacitors in the intermediate circuits
6.6.1.3 Discharging of the capacitors in the intermediate circuits
6.6.1.4 Enabling signal
6.6.1.5 Accelerator
6.6.1.6 Single-pedal switch
6.6.1.7 Steering sensor
6.6.1.8 Hand brake switch
6.6.1.9 Stop pedal switch
6.6.1.10 Switch-controlled speed reduction
6.6.1.11 Relay drivers
6.6.1.12 Motor temperature monitoring
6.6.1.13 Emergency stop microswitch
6.6.1.14 Traction motor speed monitoring
6.6.2 Controller for the working hydraulics
6.6.2.1 Power supply
6.6.2.2 Enabling signal
6.6.2.3 Joystick signals
6.6.2.4 Valve activation
6.6.2.5 Reduction of the lifting speed with low battery charge
6.6.2.6 Reed switch 3S1 of steering control valve
6.7 Control circuit - combination controllers
6.7.1 General
6.7.2 Pin design of connector X13
6.7.3 Function
6.7.3.1 Charging of the capacitors in the intermediate circuit
6.7.3.2 Discharging of the capacitors in the intermediate circuit
6.7.3.3 Enabling signal
6.7.3.4 Power supply to the accelerator and the steering potentiometer
6.7.3.5 Accelerator
6.7.3.6 Single pedal switch
6.7.3.7 Steering sensor
6.7.3.8 Hand brake switch
6.7.3.9 Stop pedal switch
6.7.3.10 Switch-controlled speed reduction
6.6.3.11 Truck coding
6.6.3.12 Relay drivers
6.7.3.13 Motor temperature monitoring
6.7.3.14 Traction motor speed monitoring
6.7.4 Function of the working hydraulics
6.7.4.1 Joystick signals
6.7.4.2 Valve activation
6.7.4.3 Switch-controlled reduction of working speed
6.7.4.4 Reduction of the lifting speed with low battery charge
6.7.4.5 Sensor 3B2 - steering valve
6.8 Software versions Types 335 -02
6.9 Truck diagnosis
6.9.1 Traction windows
6.9.1.1 Status Information
6.9.1.2 Information and fault messages
6.9.1.3 Stored fault numbers
6.9.1.4 Fault memory - operator errors
6.9.1.5 Overall fault memory
6.9.1.6 Clearing the overall fault memory
6.9.1.7 Switch inputs
6.9.1.8 Switch outputs
6.9.1.9 General analog signals
6.9.1.10 Analog signals related to the traction motors
6.9.1.11 Temperature signals
6.9.1.12 Setting of general parameters for the truck\t6.9.1.13\tSetting of special truck parameters
6.9.1.14 Display of controller information
6.9.1.15 Calibration of accelerator pedal neutral position
6.9.1.16 Calibration of steering end stops and axle type
6.9.2 Fault codes for individual controllers - traction
6.9.2.1 Summary of faults (LDC30C01/LDC30C02)
6.9.2.2 Description of faults - individual controller - traction (LDC30C01/LDC30C02)
6.9.3 Fault codes - combination controller - traction
6.9.3.1 Summary of faults (LDC40C00)
6.9.4 Windows displaying information on the working hydraulics
6.9.4.1 Status information
6.9.4.2 Current information and fault messages
6.9.4.3 Stored fault numbers
6.9.4.4 Overall fault memory
6.9.4.5 Clearing the fault memory
6.9.4.6 Switch inputs
6.9.4.7 Switch outputs
6.9.4.8 Analog signals
6.9.4.9 Analog signals for the working function
6.9.4.10 Setting of parameters for auxiliary hydraulics
6.9.4.11 Adjustment of parameters for lifting/lowering and tilting
6.9.4.12 Switch-controlled working speeds
6.9.4.13 Adjustment of discharged battery parameter
6.9.4.14 Calibration of joystick 1
6.9.4.15 Calibration of Joystick 2
6.9.4.16 Depressurising the hydraulic system
6.9.4.17 Switch off pump motor - Programmig of axle type
6.9.5 Fault codes - individual controller - working hydraulics (LLC33C00/LLC30C10)
6.9.5.1 Summary of faults
6.9.5.2 Description of faults - individual controller - working hydraulics (LLC30C10)
6.9.6 Fault codes - combination controller - working hydraulics (LDC40C50)
6.9.6.1 Summary of faults
6.9.6.2 Description of faults - combination controller - working hydraulics (LDC40C50)\t
6.10 Composite instrument
6.10.1 Description
6.10.2 Display messages
6.10.3 Programming of the composite instrument
6.10.4 Battery discharge indicator
6.10.5 Programming of the composite instrument with the diagnostic instrument
6.10.6 Diagnosis of the composite instrument with the Truck Doctor diagnostic software
6.11 Circuit diagrams
6.11.1 Circuit diagram - individual controller
6.11.2 Circuit diagram - combination controller
6.12 Window structure - for the controllers
7 Hydraulic system
7.1 Functional description of the working hydraulics
7.2 Circuit diagram of working hydraulics without pressure accumulator
7.3 Circuit diagram of working hydraulics with pressure accumulator
7.4 Emergency lowering functions of the working hydraulics
7.4.1 Manual tilting of lift mast
7.4.2 Manual lowering of the fork carrier
7.5 Control valve
7.5.1 Functional description of the control valve
7.5.2 Depressurizing of the working hydraulics
7.5.3 Repair work at the valve block
7.5.3.1 Replacing the valve cartridge of safety valve 2Y9
7.5.3.2 Replacing the valve coil of'tilting/additional hydraulic system 2Y3to2Y8
7.5.3.3 Replacing the valve coil of 'lifting/lowering 2Y1 / 2Y2"
7.5.3.4 Replacing the Tilt brake valve
7.5.3.5 replacing the valve coil of 2Y9
7.5.3.6 Setting the pressure relief valve
7.6 Replacing the micro-filter
7.7 Troubleshooting control valve
8 Mast unit
8.1 Mounting and dismounting the mast
8.2 Right-hand lift cylinder with limit position damping
8.3 Dismounting
Need Help?
Our support team is here to help you with any questions.
Guaranteed
- 30-day money back guarantee
- Secure encrypted checkout
- Lifetime access to downloads
- Free updates included
Related Products
You might also be interested in these
Linde Forklift Trucks 335 Series E14 E16 E16C E16P E18P E20P Operating Instruction (User Manual) PDF Download
$16.99
Linde Forklift Trucks 335-03 Series E16C-03 E16P-03 E20P-03 Original Instuctions (User Manual) PDF Download
$16.99
Linde Electric Fork Truck 335 Series: E14 E16 E16C E18 Service Training Manual PDF Download
$16.99
Linde Electrical Forklift Truck 335-03 Series: E16C-03 E16P-03 E20P-03 Service Training Manual PDF Download
$16.99
Ready to Start Your Repair?
Get instant access to professional repair information. Download now and start fixing today.